Classic Apple Crisp w/ Ice Cream Topping: An Incredible Ultimate Recipe
Classic Apple Crisp w/ Ice Cream Topping is an amazing dessert that beautifully combines tender apples with a crunchy topping. This delightful dish is a go-to comfort food that captures the essence of home baking. Nothing beats the aroma of baked apples mingled with cinnamon wafting through your kitchen. Paired with creamy ice cream, this dessert is sure to evoke warm feelings and invite family and friends to gather ‘round the table.
Imagine the moment when you pull a bubbling dish of Classic Apple Crisp from the oven. The golden-brown topping is inviting, and the anticipation of that first warm scoop is simply mouth-watering. Whether you’re hosting a holiday gathering or simply enjoying a cozy night at home, this recipe stands out as a cherished classic. In this article, you'll discover why this recipe is a must-try, what ingredients you'll need, and how to create this delightful dessert step-by-step.
When it comes to comfort desserts, very few can compare to the satisfying blend of sweet and tart flavors in a Classic Apple Crisp. Each spoonful is filled with flavor and texture, enhanced by the cold, creamy ice cream melting on top. Get ready, let’s dive into this incredible recipe that's perfect for all occasions!
Why You’ll Love This Recipe
Classic Apple Crisp w/ Ice Cream Topping brings together a delightful medley of simple ingredients to create a dish that resonates with comfort and nostalgia. Here’s why you’ll adore this recipe:
- Easy to Prepare – With straightforward steps, this recipe is designed for bakers of all skill levels to enjoy.
- Delicious Flavor – The combination of sweet apples and crunchy topping creates a perfect balance of flavors.
- Perfectly Versatile – This delicious dish can be customized with various fruits or nuts, allowing for personal twists.
- Always a Crowd-Pleaser – Whether it’s a family meal or a friendly get-together, this dessert always impresses.
- Infinite Serving Options – You can enjoy it alone, or amp it up with ice cream, whipped cream, or caramel sauce.
- Comfort in Every Bite – The aroma, taste, and texture all come together to provide warmth and comfort.
With these enticing reasons in mind, you’ll find yourself eager to whip up a batch of this delightful dessert.
Preparation and Cooking Time
Creating a Classic Apple Crisp w/ Ice Cream Topping doesn’t require hours of work. Here’s a simple breakdown of the time requirements:
- Preparation Time: 15-20 minutes
- Cooking Time: 40-45 minutes
- Cooling Time: 10-15 minutes
Overall, you can expect the entire process to take about 1 hour and 15 minutes, resulting in a warm, homemade dessert that is worth every single minute!
Ingredients
- 6 cups of peeled and sliced apples (such as Granny Smith or Honeycrisp)
- 1 tablespoon lemon juice
- ¾ cup granulated sugar
- 1 teaspoon ground cinnamon
- 1 cup rolled oats
- 1 cup all-purpose flour
- ½ cup packed brown sugar
- ½ cup unsalted butter, softened
- ½ teaspoon salt
- Vanilla ice cream (for serving)
Step-by-Step Instructions
Creating this delicious Classic Apple Crisp w/ Ice Cream Topping is straightforward. Just follow these easy steps to achieve dessert perfection:
- Preheat the Oven: Preheat your oven to 350°F (175°C).
- Prepare the Apples: In a large mixing bowl, combine the sliced apples with lemon juice, granulated sugar, and cinnamon. Mix well and transfer this mixture into a greased 9×13-inch baking dish.
- Make the Topping: In another bowl, mix rolled oats, flour, brown sugar, softened butter, and salt. Use your fingers or a pastry cutter to combine until the mixture resembles coarse crumbs.
- Assemble: Evenly sprinkle the oat mixture over the apple mixture in the baking dish.
- Bake: Place the dish in the preheated oven. Bake for 40-45 minutes or until the apples are tender and the topping is golden brown.
- Cool: Remove from the oven and let it cool for about 10-15 minutes before serving.
This easy approach will satisfy everyone's sweet tooth and create an irresistible dessert that is sure to be a hit!
How to Serve
Serving your Classic Apple Crisp w/ Ice Cream Topping can enhance the entire experience. Here are some tips to make your dessert memorable:
- Presentation: Serve warm in a visually appealing dish. Consider using a clear glass bowl to showcase the layering.
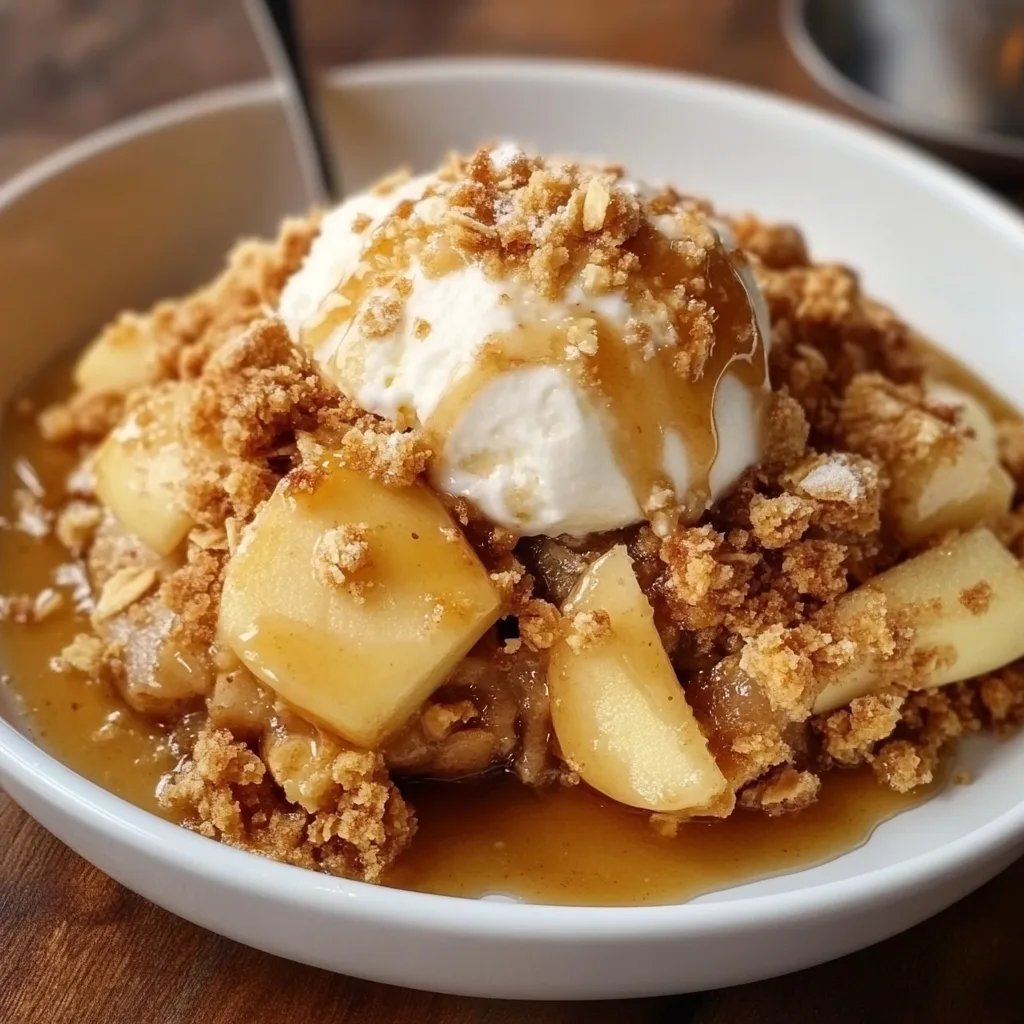
- Add Ice Cream: A scoop of vanilla ice cream on top of the warm apple crisp is a classic combination that’s sure to impress.
- Garnish: Add a sprinkle of cinnamon or a drizzle of caramel sauce to elevate the flavor and presentation.
- Serve with Fresh Cream: For those who may prefer it, serve whipped cream alongside as an alternative to ice cream.
- Pair with Drinks: Consider pairing with a warm apple cider or a nice hot coffee for a comforting touch.
By following these serving suggestions, you’ll create a memorable dessert experience for everyone to enjoy!
Additional Tips
- Choose the Right Apples: For the ultimate flavor, mix different apple varieties. Granny Smith adds tartness, while Honeycrisp offers sweetness.
- Don’t Skip the Lemon Juice: This helps prevent the apples from browning and enhances flavor balance.
- Customize Your Topping: Add chopped nuts or a dash of nutmeg to the topping for a unique twist.
- Serving Warm: Always serve your Classic Apple Crisp w/ Ice Cream Topping warm. It enhances the flavors and complements the cold ice cream perfectly.
Recipe Variation
Explore these variations to personalize your Classic Apple Crisp w/ Ice Cream Topping:
- Berry Fusion: Add a cup of fresh or frozen berries to the apple filling for an exciting burst of flavor.
- Oatmeal Raisin Style: Incorporate raisins or dried cranberries into the oat topping for added sweetness.
- Gluten-Free Option: Substitute all-purpose flour with gluten-free flour for a delicious gluten-free dessert.
- Spiced Up: Mix in a pinch of nutmeg or cloves with the cinnamon for a warm, spiced flavor.
Freezing and Storage
- Storage: Keep any leftovers covered at room temperature for up to 2 days. If required, transfer to the refrigerator for an additional 2-3 days.
- Freezing: You can freeze the unbaked apple crisp before cooking. Wrap tightly in plastic wrap and foil, and it will last for up to 3 months. Bake from frozen, adding an extra 10-15 minutes to the cooking time.
Special Equipment
These tools will make preparing your Classic Apple Crisp w/ Ice Cream Topping easier:
- Mixing Bowls: Essential for combining apples and dry ingredients.
- 9×13-inch Baking Dish: A standard size that fits the recipe perfectly.
- Measuring Cups and Spoons: To ensure accurate ingredient quantities.
- Apple Peeler: If you want to save time, using a peeler can speed up the apple preparation process.
Frequently Asked Questions
How do I know when my apple crisp is ready?
The crisp is done when the topping is golden brown, and the apples are tender when pierced with a fork.
Can I make this dessert ahead of time?
Yes! You can prepare the apple filling and the topping separately a day in advance. Assemble and bake it when you're ready to serve.
How can I make this recipe healthier?
Consider using less sugar or substitute coconut oil or applesauce for some of the butter to reduce fat content.
Is there a vegan option for this recipe?
Yes! Replace butter with coconut oil or a vegan butter alternative, and use maple syrup or agave nectar instead of granulated sugar if desired.
Can I use frozen apples?
It’s better to use fresh apples, but if frozen is all you have, make sure to drain any excess moisture before mixing them with the other ingredients.
Conclusion
The Classic Apple Crisp w/ Ice Cream Topping is a timeless dessert that brings warmth and comfort to any occasion. Its harmonious blend of sweet apples, crunchy topping, and creamy ice cream makes it a crowd favorite for all ages. It’s simple enough for a weeknight treat yet refined enough to impress guests at special gatherings. By following this recipe and tips, you’ll create a dessert that resonates with nostalgia and flavor. So, gather your ingredients, preheat the oven, and get ready to indulge in a slice of this delightful Classic Apple Crisp!