Homemade Healthy Twix Bars: An Amazing Ultimate Recipe
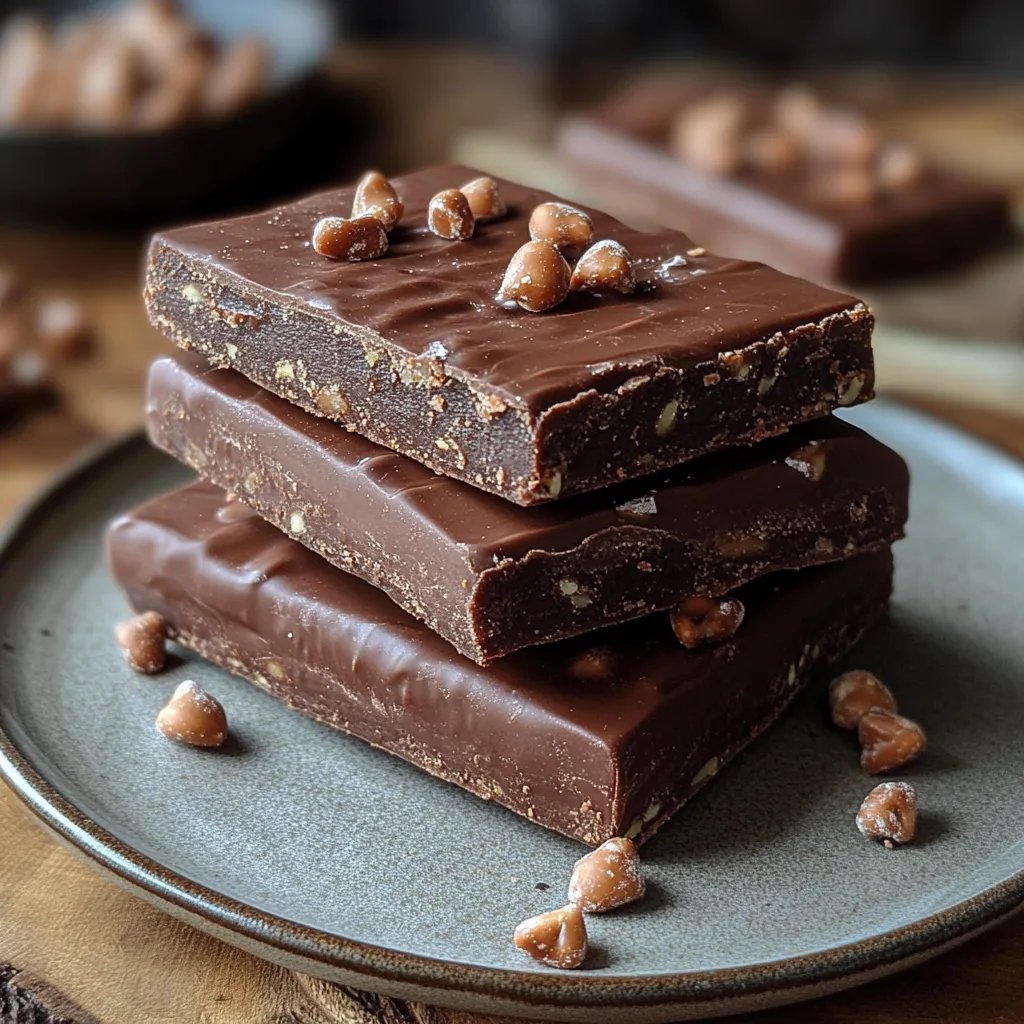
Homemade Healthy Twix Bars are the perfect treat for anyone seeking a delicious yet guilt-free dessert. These bars combine a crunchy base, a creamy caramel layer, and a satisfying chocolate coating, reminiscent of the classic candy but made with wholesome ingredients. If you're looking to indulge without the guilt, these amazing treats are your answer. They are not just about quenching your sweet tooth; they also provide a nutritious alternative that will leave you feeling satisfied without compromising your health goals.
Creating these decadent bars can become a delightful experience, bringing comfort and joy to your kitchen. The combination of natural sweeteners, nut-based crust, and dairy-free chocolate means you can enjoy all the flavors you love without the refined sugars and artificial additives found in store-bought options. These homemade delights are perfect for parties, as thoughtful gifts, or simply for those precious moments when you want something sweet yet healthy.
Let’s dive into all the amazing reasons why you’ll love making your own Homemade Healthy Twix Bars, along with the straightforward steps to create them in your own kitchen. Soon enough, you’ll discover the joy of crafting treats that please both the palate and the conscience!
Why You’ll Love This Recipe
Homemade Healthy Twix Bars are not only delicious; they also cater to a variety of dietary preferences. Here are some reasons why this recipe is a must-try:
- Guilt-Free Indulgence: These bars allow you to enjoy a candy bar experience without the guilt of consuming processed sugars and unhealthy fats.
- Nutritious Ingredients: Made with natural sweeteners, whole grains, and healthy fats, they offer sustenance without the downsides of traditional candy.
- Easy to Make: The step-by-step instructions ensure that even novice cooks can whip these up with ease.
- Customizable Flavor: You can experiment with different nuts, sweeteners, or flavoring extracts to suit your preferences.
- Perfect for Any Occasion: Whether you’re hosting a gathering or need a quick snack, these bars are versatile enough to fit any event.
- Impressive Presentation: These bars look stunning, making them a great option for impressing guests or loved ones.
With these fantastic features in mind, you’ll be excited to get started on making your own Healthy Twix Bars!
Preparation and Cooking Time
Creating your Homemade Healthy Twix Bars takes a bit of time but is well worth the effort. Here’s what to expect regarding preparation and cooking time:
- Preparation Time: 20 minutes
- Chilling Time: 1 hour
- Total Time: 1 hour and 20 minutes
Allowing the bars to chill is crucial for achieving the perfect texture, but the active cooking time is quite short, making it easy for anyone to fit this treat into their schedule.
Ingredients
- Base Layer:
- 1 cup almond flour
- 1/4 cup oats
- 2 tablespoons coconut oil (melted)
- 2 tablespoons maple syrup or honey (for a vegan option)
- Pinch of salt
- Caramel Layer:
- 1 cup Medjool dates (pitted)
- 1/4 cup nut butter (such as almond or peanut butter)
- 1 tablespoon coconut milk
- 1 teaspoon vanilla extract
- Chocolate Coating:
- 1 cup dark chocolate chips (dairy-free if needed)
- 1 tablespoon coconut oil
Step-by-Step Instructions
Follow these easy steps to create your Homemade Healthy Twix Bars:
- Prepare the Base Layer: In a mixing bowl, combine almond flour, oats, melted coconut oil, maple syrup, and a pinch of salt. Mix until well combined.
- Press into Pan: Line a small rectangular dish with parchment paper, then press the base mixture evenly into the bottom of the dish.
- Chill the Base: Place the dish in the refrigerator for about 30 minutes to allow the base to set.
- Make the Caramel Layer: In a food processor, combine the pitted dates, nut butter, coconut milk, and vanilla extract. Blend until a smooth consistency is achieved.
- Spread Caramel: Remove the base layer from the refrigerator and spread the caramel mixture evenly over it.
- Chill Again: Return the dish to the refrigerator for 30 minutes to firm up the caramel layer.
- Prepare the Chocolate Coating: In a microwave-safe bowl, melt the dark chocolate chips with coconut oil. Stir until smooth.
- Coat the Bars: Once the layers are set, cut the bars into desired sizes. Dip each bar into the melted chocolate, coating fully.
- Set the Chocolate: Place the coated bars back onto the parchment paper and refrigerate until the chocolate hardens, about 15 minutes.
- Serve: Enjoy your Homemade Healthy Twix Bars straight from the refrigerator, or store them in an airtight container for later snacking.
How to Serve
When it comes to serving Homemade Healthy Twix Bars, here are some ideas to enhance your experience:
- Garnish: Drizzle some melted chocolate over the bars for a decorative touch.
- Pairing: Serve with fresh fruit or a scoop of Greek yogurt for a satisfying snack.
- Storage: Keep the bars in the fridge for a refreshing treat that stays firm but is easy to bite into when chilled.
- Decoration: Surround the bars with nuts or shredded coconut on a platter for an inviting display that guests will adore.
With these serving suggestions, you can elevate your Homemade Healthy Twix Bars from simply delicious to an exquisite treat perfect for any occasion!
Additional Tips
- Experiment with Sweeteners: Try using different natural sweeteners like agave nectar or brown rice syrup to find the flavor profile you prefer.
- Add Texture: For added crunch, consider mixing in chia seeds or crispy quinoa with the base layer.
- Make it Vegan: Substitute the almond butter with a nut-free option, and replace dark chocolate chips with dairy-free varieties.
- Allow to Cool Completely: Ensure all layers cool completely before adding the next layer for better cohesion and texture.
- Slice with Care: Use a sharp knife warmed with hot water to make slicing the bars easier and neater.
Recipe Variation
Feel free to switch things up! Here are a few variations to try:
- Nut-Free Option: Use sunflower seed butter instead of nut butter and coconut flour instead of almond flour for a nut-free version.
- Caramel Flavor Enhancer: Add a tablespoon of miso paste to the caramel layer for a unique umami twist that enhances the sweetness.
- Flavor Infusion: Stir in a teaspoon of espresso powder into the chocolate coating for a mocha flavor.
- Dried Fruit Addition: Incorporate chopped dried fruits like apricots or cranberries into the base layer for a fruity surprise.
Freezing and Storage
- Storage: Keep your Homemade Healthy Twix Bars in an airtight container in the fridge. They can last up to a week while retaining freshness.
- Freezing: You can freeze these bars for up to three months. Wrap each bar individually in plastic wrap and place them in a freezer-safe container.
Special Equipment
You will need a few essential tools to prepare these bars successfully:
- Mixing bowls
- Food processor for blending
- Rectangular dish (for setting the layers)
- Parchment paper for lining
- Microwave-safe bowl for melting chocolate
Frequently Asked Questions
Can I substitute almond flour with another flour?
Yes, you can use oat flour or even all-purpose flour if gluten is not a concern.
Are these bars safe for children?
Absolutely! These bars are made with wholesome ingredients, making them a safe and healthier treat for children.
How long do these bars take to set?
Each layer should chill for about 30 minutes, so the overall time, including chilling, is about 1 hour and 20 minutes.
Can I use other types of nuts?
Certainly! You can use whatever nuts you have on hand but be sure to account for any potential allergies.
What can I serve these bars with?
These bars pair beautifully with fresh fruit or as a topping on yogurt for a nutritious snack.
Conclusion
Homemade Healthy Twix Bars are a delightful way to satisfy your sweet cravings without straying from your health goals. With their rich layers of crunchy base, gooey caramel, and luscious chocolate, these bars offer an indulgent treat that also stays true to a healthy lifestyle. You can enjoy them during special occasions, gift them to loved ones, or simply indulge in them whenever you have a sweet tooth.
By following the steps outlined in this recipe, you can create a delicious and nutritious homemade snack that your family will love!