Red Velvet Buttermilk Cake
Highlighted under: Whisked Delight Recipes
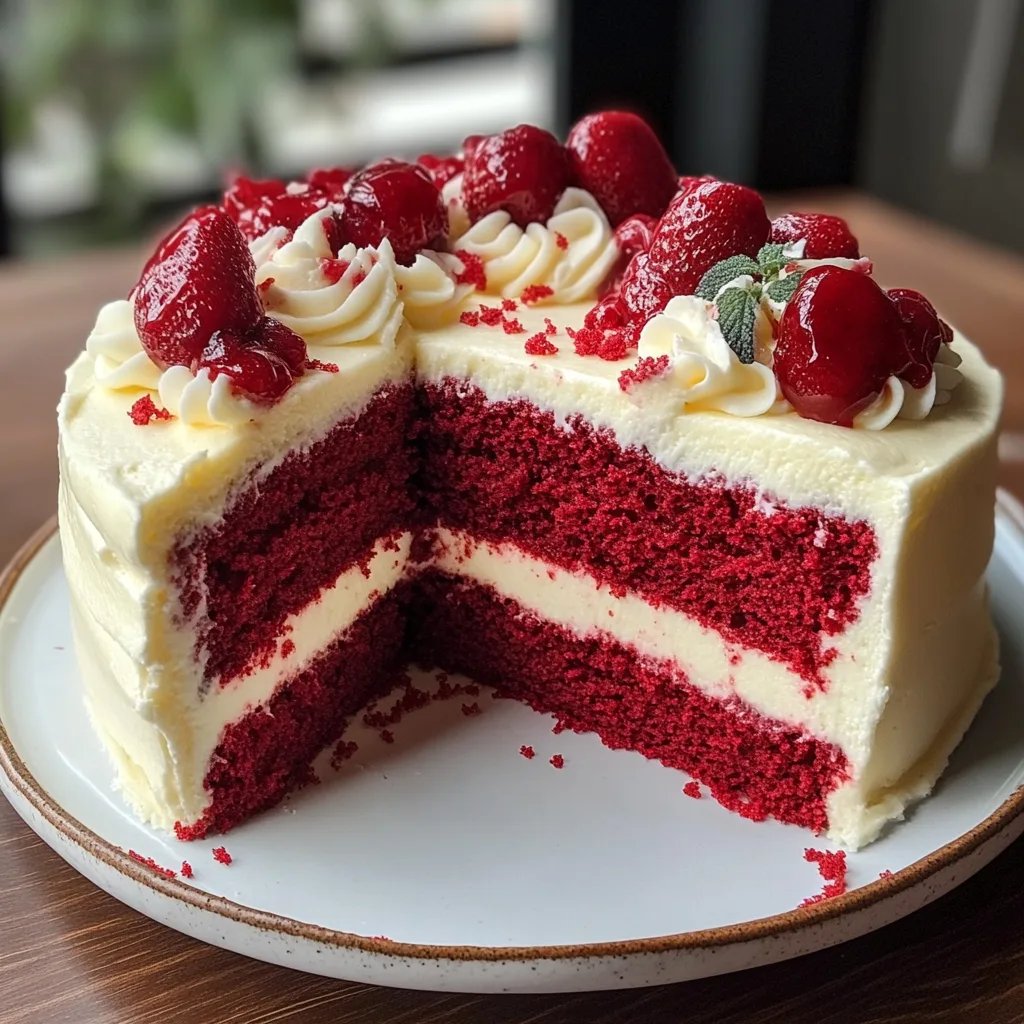
Experience the ultimate dessert with this luscious Red Velvet Buttermilk Cake recipe. This beautifully vibrant cake is incredibly moist and rich, thanks to the addition of buttermilk, making it a delightful treat for birthdays, celebrations, or any special occasion. Topped with a creamy cream cheese frosting, this cake not only looks stunning but also melts in your mouth with its tender crumb and hint of cocoa.
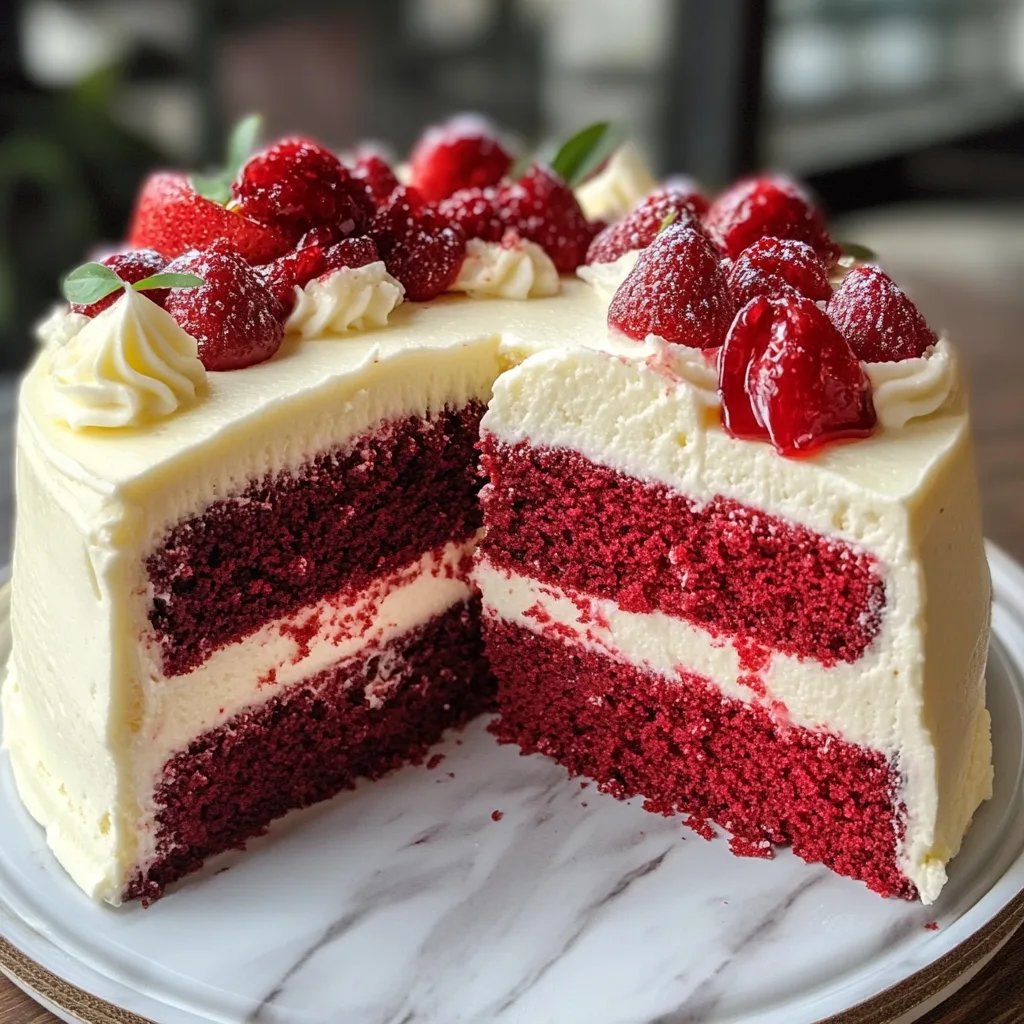
Celebrate special moments with this delectable Red Velvet Buttermilk Cake. This dessert is known for its vibrant color and luxurious taste.
The Origins of Red Velvet Cake
Red Velvet Cake has a storied history that traces back to the United States in the 1920s. This iconic dessert gained popularity for its striking red color and rich flavor, often described as a sophisticated blend of chocolate and vanilla. Its unique hue is not just a result of food coloring; originally, the reaction between cocoa powder and acidic ingredients like buttermilk and vinegar contributed to its vibrant appearance. Over the decades, Red Velvet has become a staple in bakeries and homes, especially in southern regions, and is often reserved for special occasions and celebrations.
This cake became widely known after it was featured in a marketing campaign by a famous flour company, which positioned it as a luxurious dessert. The cake's popularity surged during the 1980s, coinciding with the rise of home baking, fueled by its eye-catching color and delicious flavor. Today, Red Velvet Buttermilk Cake continues to charm dessert lovers, embodying the spirit of celebration with its rich textures and eye-catching presentation.
Perfect Pairings for Red Velvet Buttermilk Cake
This luscious Red Velvet Buttermilk Cake is a true showstopper, ideal for a range of occasions. It pairs wonderfully with a variety of beverages, making it an excellent choice for parties and gatherings. Consider serving it with a glass of chilled milk, a rich cup of coffee, or a glass of sparkling wine. Each sip complements the cake’s luscious texture and enhances the overall dining experience, creating an unforgettable treat for your guests.
For those looking to elevate their dessert experience, consider pairing Red Velvet Cake with fresh berries or a scoop of vanilla ice cream. The tartness of berries contrasts beautifully with the sweetness of the cake, while the creaminess of ice cream adds an indulgent touch. Whether served as a centerpiece for a birthday party, an elegant evening gathering, or a simple family dinner, this cake is sure to delight and impress, making it a versatile choice for many events.
Tips for Baking the Perfect Red Velvet Cake
To ensure your Red Velvet Buttermilk Cake turns out perfectly, it’s crucial to measure your ingredients accurately. Use a kitchen scale whenever possible, as this guarantees consistency and great results. Additionally, don’t skip the sifting step for dry ingredients; it not only removes lumps but also aerates the flour for a lighter cake. Remember, each ingredient plays a vital role in the overall texture and flavor of the cake, so precision is key.
Another important tip is to keep an eye on baking times. Every oven varies slightly in temperature, so check your cake a few minutes before the recommended time. If a toothpick inserted in the center comes out clean or with a few moist crumbs, it’s done. After baking, allow the cakes to cool in the pans before transferring them to a wire rack; this helps to prevent breakage and ensures a well-formed cake that is easier to frost. With attention to detail and care in preparation, your Red Velvet Buttermilk Cake will be a stunning success.
Ingredients
For the Cake
- 2 1/2 cups all-purpose flour
- 1 1/2 cups granulated sugar
- 1 teaspoon baking soda
- 1 teaspoon salt
- 1 teaspoon cocoa powder
- 1 1/2 cups vegetable oil
- 1 cup buttermilk, room temperature
- 2 large eggs, room temperature
- 2 tablespoons red food coloring
- 1 teaspoon vanilla extract
- 1 teaspoon white vinegar
For the Cream Cheese Frosting
- 8 oz cream cheese, softened
- 1/2 cup unsalted butter, softened
- 2 cups powdered sugar
- 1 teaspoon vanilla extract
Make sure all ingredients are at room temperature for best results.
Instructions
Prepare the Oven and Pans
Preheat your oven to 350°F (175°C) and grease and flour two 9-inch round cake pans.
Mix Dry Ingredients
In a large bowl, sift together the flour, sugar, baking soda, salt, and cocoa powder.
Combine Wet Ingredients
In another bowl, whisk together the oil, buttermilk, eggs, food coloring, vanilla, and vinegar.
Combine Mixtures
Gradually add the wet ingredients to the dry ingredients and mix until just combined.
Bake the Cakes
Divide the batter evenly between the prepared pans and bake for 25-30 minutes, or until a toothpick inserted in the center comes out clean.
Cool the Cakes
Allow the cakes to cool in the pans for 10 minutes, then remove from pans and cool completely on wire racks.
Make the Frosting
In a large bowl, beat together the cream cheese and butter until smooth. Gradually add powdered sugar and vanilla until creamy.
Frost the Cake
Once the cakes are completely cool, spread cream cheese frosting on the top of one layer, place the second layer on top, and frost the top and sides.
Enjoy your delicious Red Velvet Buttermilk Cake!
Pro Tips
For a richer color, use a high-quality red food coloring.
Storage and Serving Suggestions
Once you've baked your delicious Red Velvet Buttermilk Cake, it can be stored for several days, making it an ideal dessert for prepping in advance. To keep the cake fresh, store it in an airtight container at room temperature for up to three days. If you'd like to prolong its shelf life, consider refrigerating it, which can extend freshness up to a week. Just be sure to let it come to room temperature before serving to fully enjoy its flavor and texture.
For festive occasions, you can also freeze the cake before frosting. Wrap each layer tightly in plastic wrap and then in aluminum foil, ensuring there’s no air to prevent freezer burn. When you’re ready to serve, simply thaw the layers in the fridge overnight and frost once they’re back to room temperature. This makes Red Velvet Buttermilk Cake an excellent choice for advance planning for birthdays, anniversaries, or holiday dinners.
Variations to Try
While traditional Red Velvet Buttermilk Cake is undoubtedly delicious, there are several fun variations you can experiment with. For a twist on flavor, consider adding different extracts such as almond or orange to the batter, which can provide a unique aromatic profile. You can also incorporate chocolate chips for an added indulgence or nuts for a delightful crunch. The beauty of this recipe lies in its versatility, allowing you to customize it according to your taste preferences.
Another variation to consider is transforming this classic cake into cupcakes. Simply adjust your baking time, as cupcakes typically take about 15-20 minutes to bake. Top them with the same creamy cream cheese frosting and consider adding decorative elements like sprinkles or decorative frosting tips to elevate their presentation. These small cakes make perfect individual servings for parties, allowing guests to enjoy the flavors of Red Velvet in a fun, portable format.
Questions About Recipes
→ Can I substitute buttermilk?
Yes, you can use milk with a tablespoon of vinegar or lemon juice added.
→ How can I make this cake gluten-free?
You can substitute the all-purpose flour with a gluten-free flour blend.
Red Velvet Buttermilk Cake
Created by: The Dishpark Team
Recipe Type: Whisked Delight Recipes
Skill Level: Intermediate
Final Quantity: 8 servings
What You'll Need
For the Cake
- 2 1/2 cups all-purpose flour
- 1 1/2 cups granulated sugar
- 1 teaspoon baking soda
- 1 teaspoon salt
- 1 teaspoon cocoa powder
- 1 1/2 cups vegetable oil
- 1 cup buttermilk, room temperature
- 2 large eggs, room temperature
- 2 tablespoons red food coloring
- 1 teaspoon vanilla extract
- 1 teaspoon white vinegar
For the Cream Cheese Frosting
- 8 oz cream cheese, softened
- 1/2 cup unsalted butter, softened
- 2 cups powdered sugar
- 1 teaspoon vanilla extract
How-To Steps
Preheat your oven to 350°F (175°C) and grease and flour two 9-inch round cake pans.
In a large bowl, sift together the flour, sugar, baking soda, salt, and cocoa powder.
In another bowl, whisk together the oil, buttermilk, eggs, food coloring, vanilla, and vinegar.
Gradually add the wet ingredients to the dry ingredients and mix until just combined.
Divide the batter evenly between the prepared pans and bake for 25-30 minutes, or until a toothpick inserted in the center comes out clean.
Allow the cakes to cool in the pans for 10 minutes, then remove from pans and cool completely on wire racks.
In a large bowl, beat together the cream cheese and butter until smooth. Gradually add powdered sugar and vanilla until creamy.
Once the cakes are completely cool, spread cream cheese frosting on the top of one layer, place the second layer on top, and frost the top and sides.
Extra Tips
For a richer color, use a high-quality red food coloring.
Nutritional Breakdown (Per Serving)
- Calories: 350
- Fat: 18g
- Carbohydrates: 45g
- Protein: 3g