Ultimate Red Velvet Layer Cake Recipe
Highlighted under: Whisked Delight Recipes
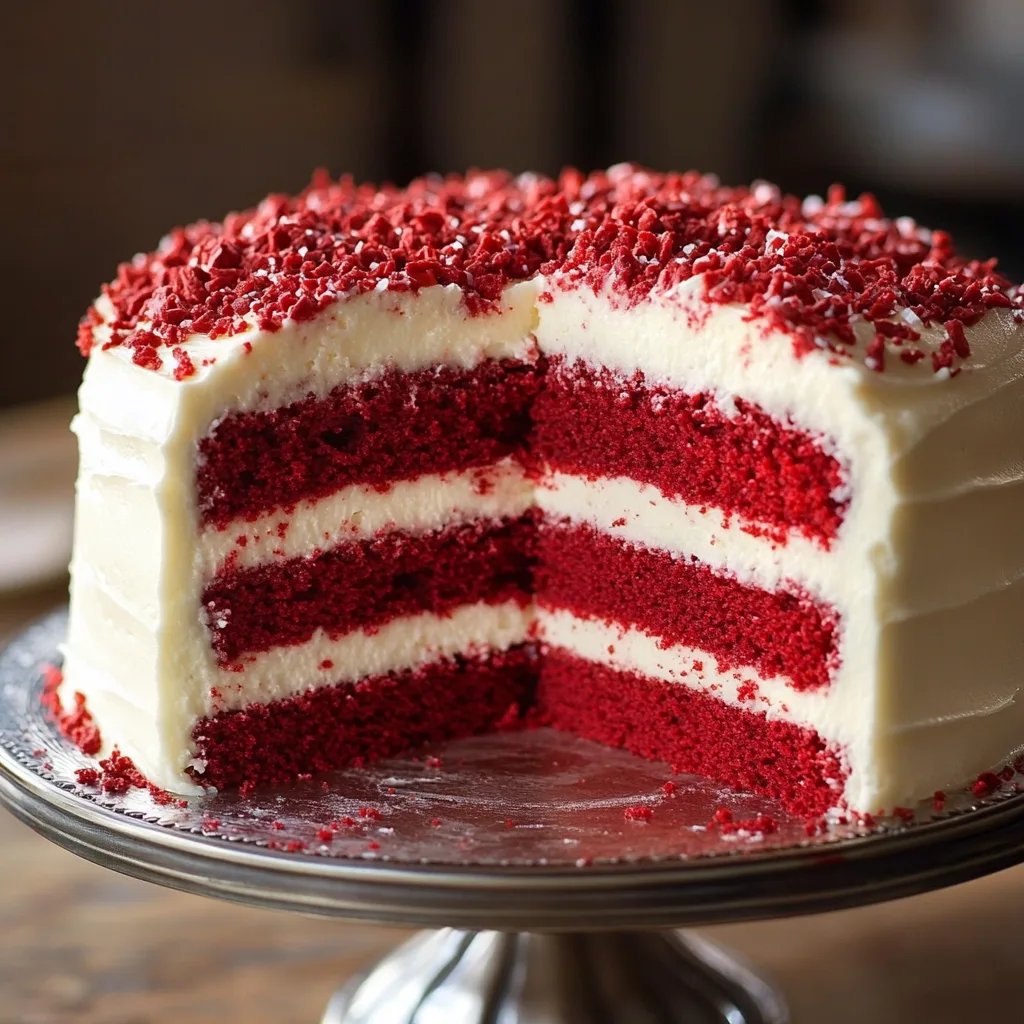
Experience the ultimate celebration with this stunning Red Velvet Layer Cake. Featuring vibrant red cocoa layers and a creamy, luscious cream cheese frosting, this cake is perfect for birthdays, weddings, or any special occasion. Each slice delivers a moist and decadent flavor that's sure to impress your guests. Elevate your dessert table with this show-stopping recipe!
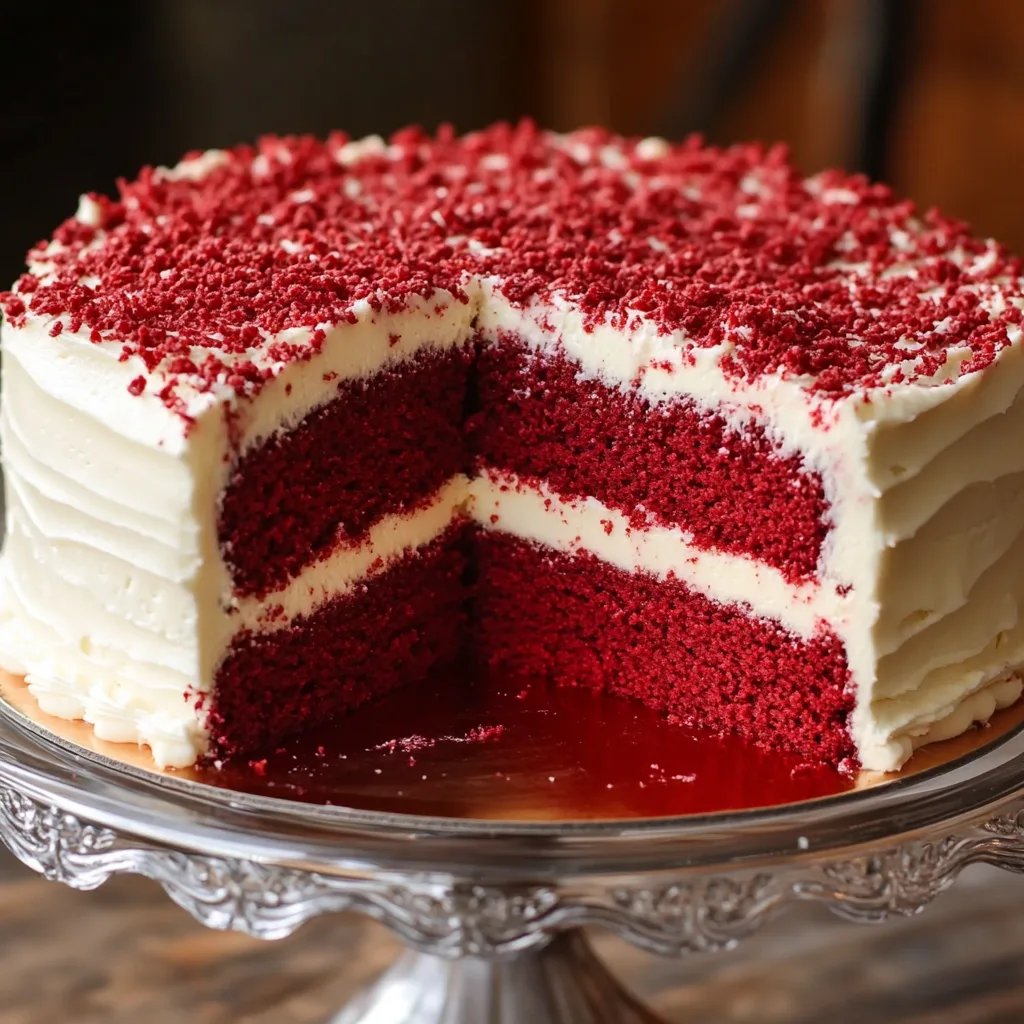
This Ultimate Red Velvet Layer Cake is more than just a dessert; it's a statement piece for your celebrations. The rich cocoa flavor combined with the vibrant red color is visually striking and deliciously satisfying.
The Art of Red Velvet Cake
Red velvet cake stands out not only for its striking color but also for its unique flavor profile that captivates the palate. This cake combines the rich taste of cocoa with the tanginess of buttermilk, creating a velvety texture that melts in your mouth. The iconic reddish hue is achieved through a combination of ingredients, and it's this visual appeal that often makes it the centerpiece of any dessert spread. Mastering the art of red velvet cake will surely enhance your baking repertoire.
The history of red velvet cake is as rich as its flavor. Traditionally thought to have originated in the southern United States, this cake has evolved over the decades to become a national favorite. Modern recipes often incorporate ingredients like cocoa and buttermilk, which not only contribute to its distinct flavor but also add to the moistness that defines a perfect red velvet cake.
Tips for Baking Success
To ensure your red velvet cake layers come out perfectly, using a kitchen scale to measure your ingredients can be surprisingly beneficial. Baking is a science, and even slight variations in ingredient amounts can affect the final product's texture and taste. To achieve the best results, follow the measurements carefully and consider using room temperature ingredients as specified in the recipe. This helps create a beautifully blended batter that will bake evenly.
It’s also essential to avoid overmixing the batter once the wet and dry ingredients are combined. Overmixing can lead to a denser cake that lacks the light, fluffy texture you desire. Mix until just incorporated for the best outcome. Furthermore, always conduct the toothpick test before removing the cakes from the oven; it should come out clean to indicate that they are perfectly baked.
Celebration-Ready Red Velvet Cake
This ultimate red velvet layer cake is perfect for various occasions, from birthdays to weddings or even casual gatherings. Its beautiful layers and rich cream cheese frosting make it a visually stunning treat that impresses guests and adds joy to the celebration. Serve it as the highlight of a dessert table, and watch it disappear in no time! With every slice, your guests will enjoy its moistness and delightful flavor.
When it comes to decorating your red velvet cake, the possibilities are endless. Personalize it to suit the occasion; you can use fresh flowers, edible glitter, or themed cake toppers. If you're feeling adventurous, try swirling additional colors into the cream cheese frosting or adding a sprinkle of cocoa powder for extra flair. No matter how you choose to decorate, this cake is sure to become a beloved fixture at your events.
Ingredients
For the Cake
- 2 1/2 cups all-purpose flour
- 1 1/2 cups granulated sugar
- 1 teaspoon baking soda
- 1 teaspoon salt
- 1 tablespoon cocoa powder
- 1 1/2 cups vegetable oil
- 1 cup buttermilk, room temperature
- 2 large eggs, room temperature
- 2 tablespoons red food coloring
- 1 teaspoon vanilla extract
- 1 teaspoon white vinegar
For the Cream Cheese Frosting
- 1 cup unsalted butter, softened
- 8 oz cream cheese, softened
- 4 cups powdered sugar
- 1 teaspoon vanilla extract
- 1-2 tablespoons milk (if needed for consistency)
Instructions
Prepare the Cake Batter
Preheat the oven to 350°F (175°C). Grease and flour three 9-inch round cake pans.
In a large mixing bowl, sift together the flour, sugar, baking soda, salt, and cocoa powder.
In another bowl, whisk together the vegetable oil, buttermilk, eggs, food coloring, vanilla extract, and vinegar until well combined.
Gradually add the wet ingredients to the dry ingredients, mixing until just combined.
Bake the Cakes
Divide the batter evenly among the prepared cake pans. Bake in the preheated oven for 25-30 minutes, or until a toothpick inserted into the center comes out clean.
Let the cakes cool in the pans for 10 minutes before transferring to wire racks to cool completely.
Make the Frosting
In a large bowl, beat the softened butter and cream cheese together until smooth and creamy. Gradually add the powdered sugar and vanilla extract. Beat until fluffy, adding milk if necessary for desired consistency.
Assemble the Cake
Once the cakes are completely cool, place one layer on a serving plate. Spread a layer of cream cheese frosting on top, then add the second layer, repeating the process. Place the third layer on top and frost the entire cake with the remaining cream cheese frosting.
Decorate and Serve
Decorate the cake as desired. Slice and serve to enjoy the ultimate red velvet experience!
Pro Tips
- For a deeper flavor, allow the cake to rest overnight before serving. This allows the flavors to meld beautifully.
Storing Your Cake
To maintain the freshness of your red velvet cake, proper storage is key. After decorating, if you have any leftovers—though that’s unlikely!—ensure that you store the cake in an airtight container. Ideally, it should be kept in the refrigerator, as the cream cheese frosting is perishable. When storing, try to place the cake on a flat surface to avoid any damage to the layers.
If you prefer to make the cake in advance, you can also freeze the un-frosted layers. Wrap them individually in plastic wrap and then in aluminum foil to prevent freezer burn. When you’re ready to enjoy your cake, simply thaw it overnight in the fridge and then frost it with your cream cheese mixture before serving.
Serving Suggestions
Pairing your red velvet cake with the right accompaniments can elevate the experience. A glass of cold milk or a scoop of vanilla ice cream makes for delightful pairings that complement the cake’s richness. For a more sophisticated touch, consider serving it alongside a raspberry or strawberry coulis that adds a fresh berry note to the decadent flavors of the cake.
Another excellent idea is to serve slices with a dollop of whipped cream or crème fraîche, which offers a balance of sweetness and tang that harmonizes beautifully with the cream cheese frosting. Whatever your choice, these suggestions will enhance the overall enjoyment of your sumptuous red velvet cake.
Common FAQs
One common question is how to achieve the perfect red color in your cake. The key lies in using high-quality red food coloring; gel coloring often works best as it provides a vibrant shade without altering the cake's wetness. Adjust the amount if needed based on your preference for color intensity while ensuring it remains true to the classic red velvet appearance.
Another frequently asked question relates to the use of buttermilk. If you don’t have buttermilk handy, you can easily make a substitute by mixing one cup of milk with a tablespoon of white vinegar or lemon juice. Let it sit for a few minutes to curdle slightly, and it will work wonderfully in this recipe without compromising the flavor or texture of your cake.
Questions About Recipes
→ Can I make this cake ahead of time?
Yes, you can make the cakes ahead of time and freeze them. Just be sure to wrap them well to prevent freezer burn.
→ What can I substitute for buttermilk?
You can use regular milk combined with a tablespoon of vinegar or lemon juice as a substitute for buttermilk.
Ultimate Red Velvet Layer Cake Recipe
Created by: The Dishpark Team
Recipe Type: Whisked Delight Recipes
Skill Level: Intermediate
Final Quantity: 12.0
What You'll Need
For the Cake
- 2 1/2 cups all-purpose flour
- 1 1/2 cups granulated sugar
- 1 teaspoon baking soda
- 1 teaspoon salt
- 1 tablespoon cocoa powder
- 1 1/2 cups vegetable oil
- 1 cup buttermilk, room temperature
- 2 large eggs, room temperature
- 2 tablespoons red food coloring
- 1 teaspoon vanilla extract
- 1 teaspoon white vinegar
For the Cream Cheese Frosting
- 1 cup unsalted butter, softened
- 8 oz cream cheese, softened
- 4 cups powdered sugar
- 1 teaspoon vanilla extract
- 1-2 tablespoons milk (if needed for consistency)
How-To Steps
Preheat the oven to 350°F (175°C). Grease and flour three 9-inch round cake pans.
In a large mixing bowl, sift together the flour, sugar, baking soda, salt, and cocoa powder.
In another bowl, whisk together the vegetable oil, buttermilk, eggs, food coloring, vanilla extract, and vinegar until well combined.
Gradually add the wet ingredients to the dry ingredients, mixing until just combined.
Divide the batter evenly among the prepared cake pans. Bake in the preheated oven for 25-30 minutes, or until a toothpick inserted into the center comes out clean.
Let the cakes cool in the pans for 10 minutes before transferring to wire racks to cool completely.
In a large bowl, beat the softened butter and cream cheese together until smooth and creamy. Gradually add the powdered sugar and vanilla extract. Beat until fluffy, adding milk if necessary for desired consistency.
Once the cakes are completely cool, place one layer on a serving plate. Spread a layer of cream cheese frosting on top, then add the second layer, repeating the process. Place the third layer on top and frost the entire cake with the remaining cream cheese frosting.
Decorate the cake as desired. Slice and serve to enjoy the ultimate red velvet experience!
Extra Tips
- For a deeper flavor, allow the cake to rest overnight before serving. This allows the flavors to meld beautifully.
Nutritional Breakdown (Per Serving)
- Serving Size: 1 slice
- Calories: 450
- Fat: 20g
- Carbohydrates: 60g
- Protein: 4g